Hi guys...
we meet again...
Today, i want to show something about different topic and not in our syllabus study...
but just for additional knowledge...
but just for additional knowledge...
Do you know how to create partition in Windows 7..?
If you dont know, you must read about this topic...
^.^
Do you know why creating a partition is very important..?
actually, it allows you to store your important data, whether in computers or in the external hard disk,
if there any disaster or you need to format your computer...
if there any disaster or you need to format your computer...
You just follow these steps & you can get the new partition in your disk...
it is easy...

Firstly, you should go to 'Start' button, then right click 'My Computer' & then click 'Manage' option...

Then, you brought to the 'Computer Management' program..

After that, you have to click on the 'Storage' bar & then click on 'Disk Management'...
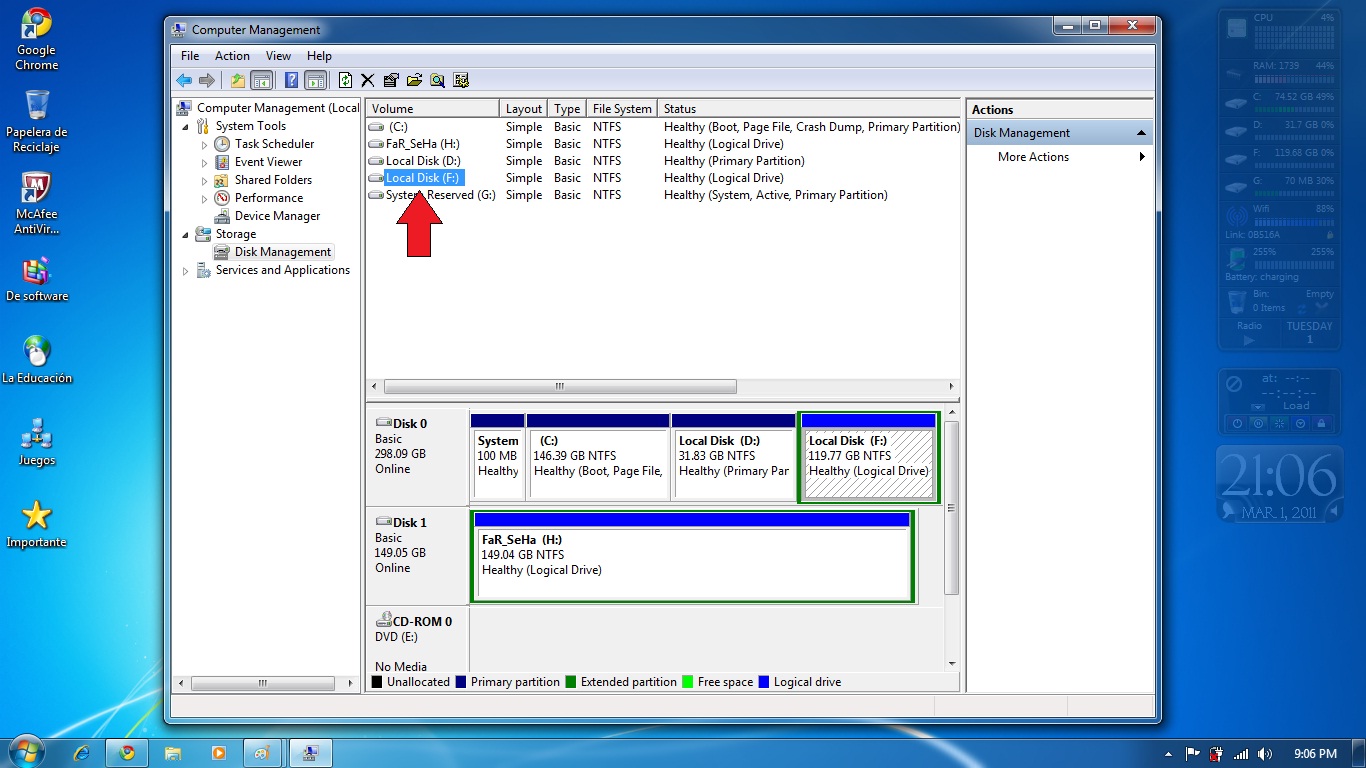
Next steps is you have to Select the drive which you want to partition...
For example : i will choose my Local Disk (F:)
below the drive list, there has the part or division of your drive space...

Next, you have to right click on the drive & you need to click on 'Shrink Volume' option...
You also can delete the volume if you wont need it...

You can see that the box which present the size of the hard drive & the total volume that available to shrink.
you are require to Enter the amount you would like to shrink (remember that this will be the size for new partition & approx 1000 MB = 1 GB)...

You need wait for a while...
after that, you will see the 'unallocated' space which is the size that just been shrunk...
then you Select it & right click on the 'New Simple Volume' option..

then you just Follow the Wizard that appear and Fill in the Size of the Partition of the drive...
Assign a drive letter so that you can make a difference to other disks....
Remember that you must Ensure NTFS is select on the file system & then Enter the name for your drive...
Lastly, click 'Next' followed by 'Finish'...
The new drive are ready to be use...
The new drive are ready to be use...
Easy rite..?
If you need more help, just click on this smiley (^.^)
No comments:
Post a Comment